D850 Holy Grail Timelapse

This post will cover the steps for setting up the D850 for the automated Holy Grail timelapse technique (manually adjusting exposure settings to compensate for changing light) using qDslrDashboard/ControlMyCamera app on an IOS device with a direct Wi-Fi connection between the app and the iphone/ipad (no Snapbridge app). The D850 requires firmware version 1.10 to establish a direct Wi-Fi connection. I’m using an iPad pro but the process is the same for any IOS device, the big iPad just works a lot better for screenshots, in the field I use my phone.
I’ll be using the D850’s built in intervalometer to make use of the silent shooting/electronic shutter mode.
Go into the camera’s setup menu and enable the WiFi:


Go into the iPad’s wifi menu and connect to the D850 network, you’ll need to enter the password the first time you connect.

Launch the ControlMyCamera app on the ipad and press the Nikon button to establish a connection to the camera.
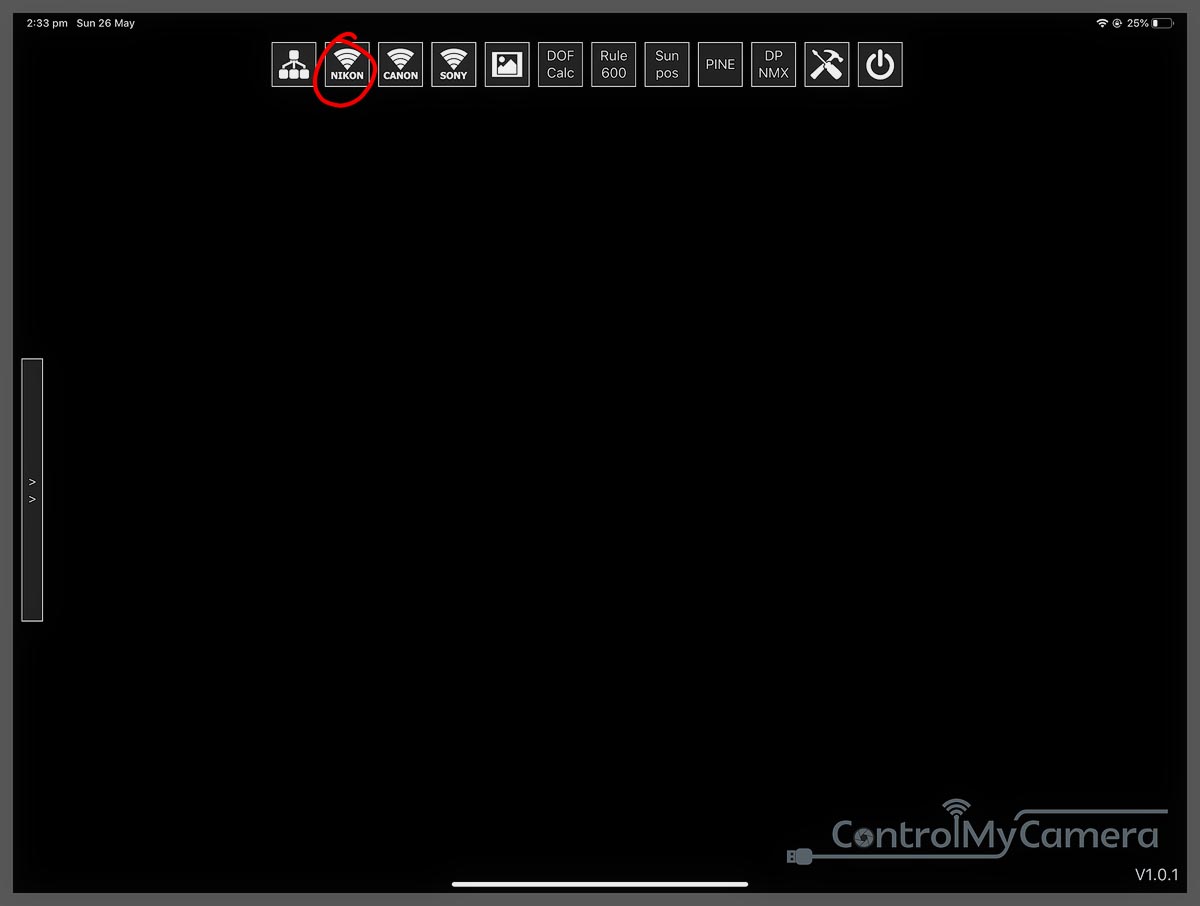

Once connected you will see this screen, press the LRTimelapse button.

If you want to use aperture ramping you’ll need to enable it in the settings menu.


Set the limits you want for exposure time, iso and aperture.


Set the ramping direction.


Set the mode dial to Q, other modes keep the LCD backlight on when the screen is blank.
Make sure exposure delay mode and image review are turned off.

Set the camera to shoot RAW+JPG, the JPGs are used for the image preview in the app, set the JPG quality to basic and the size to small for the fastest possible transfer over Wi-Fi.

Set up the scene you want to shoot, once everything is set you can turn off autofocus on the camera or the lens. Set the shutter iso and aperture settings you want to use, I take a few test shots to make sure I’m not clipping the highlights.
It’s raining outside so I’m just shooting a print on the wall for this, the room has LIFX lighting which gives me full control of the light levels and lets me simulate the fading light of a sunset shoot.

Press the Capture Sample button, after a few seconds the small JPG will be transferred to the iPad.
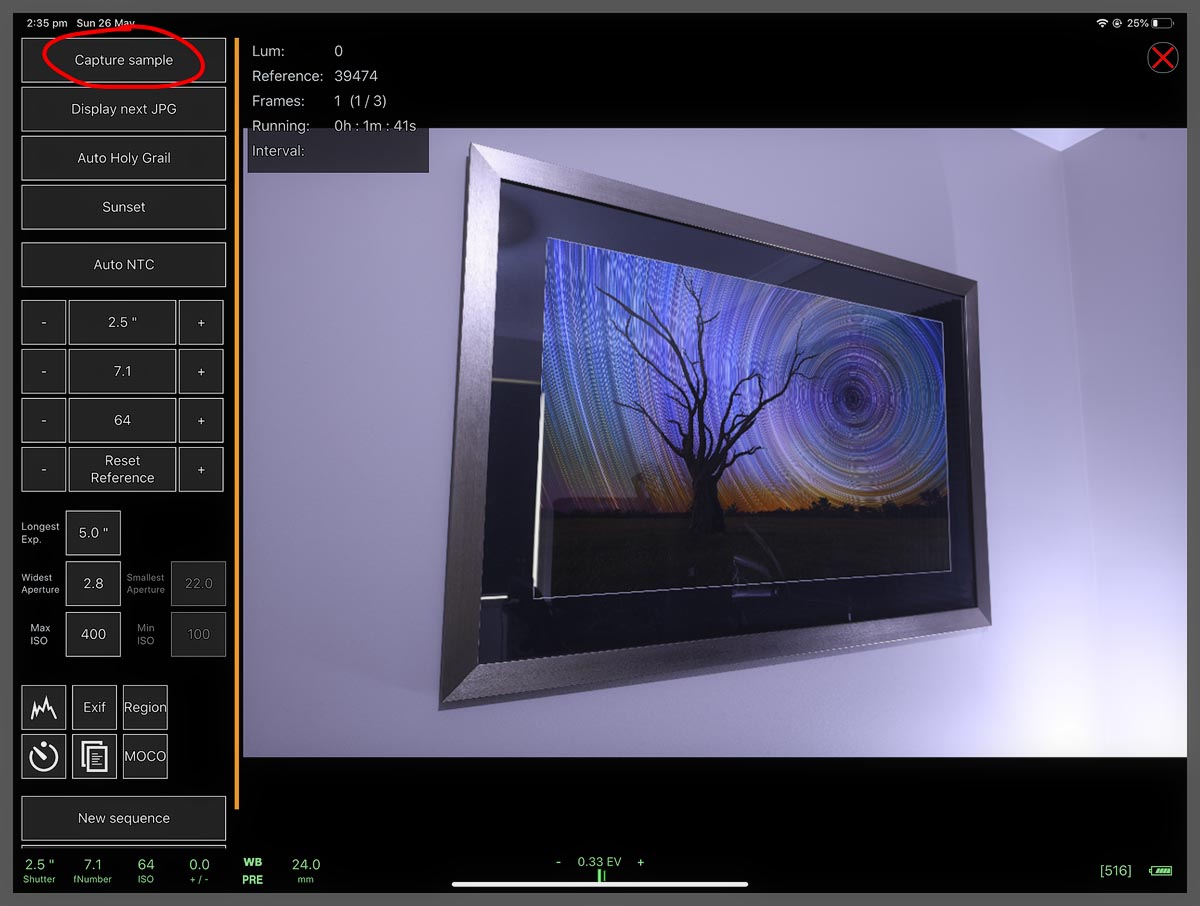
The settings you used for this image will be used as the reference exposure settings for the rest of the sequence. Turn on the histograms if they aren’t already shown.

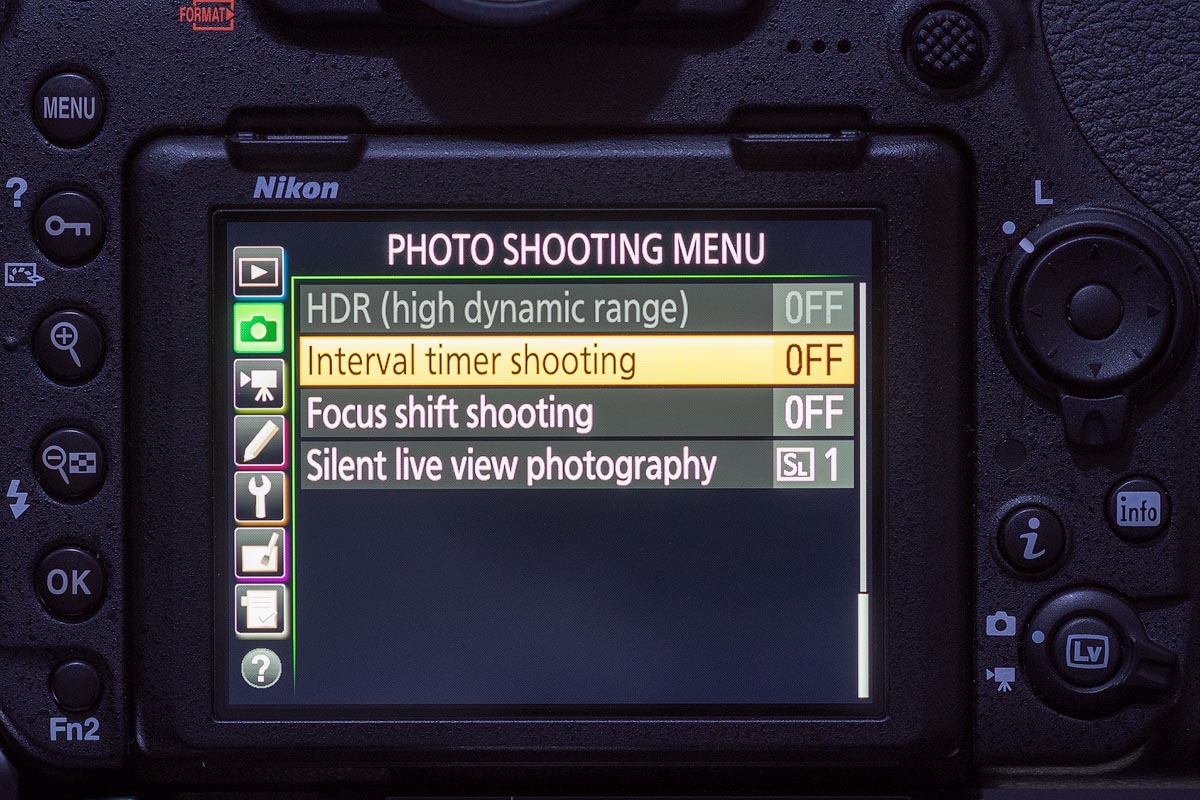
Now go to interval timer shooting in the camera’s photo shooting menu.
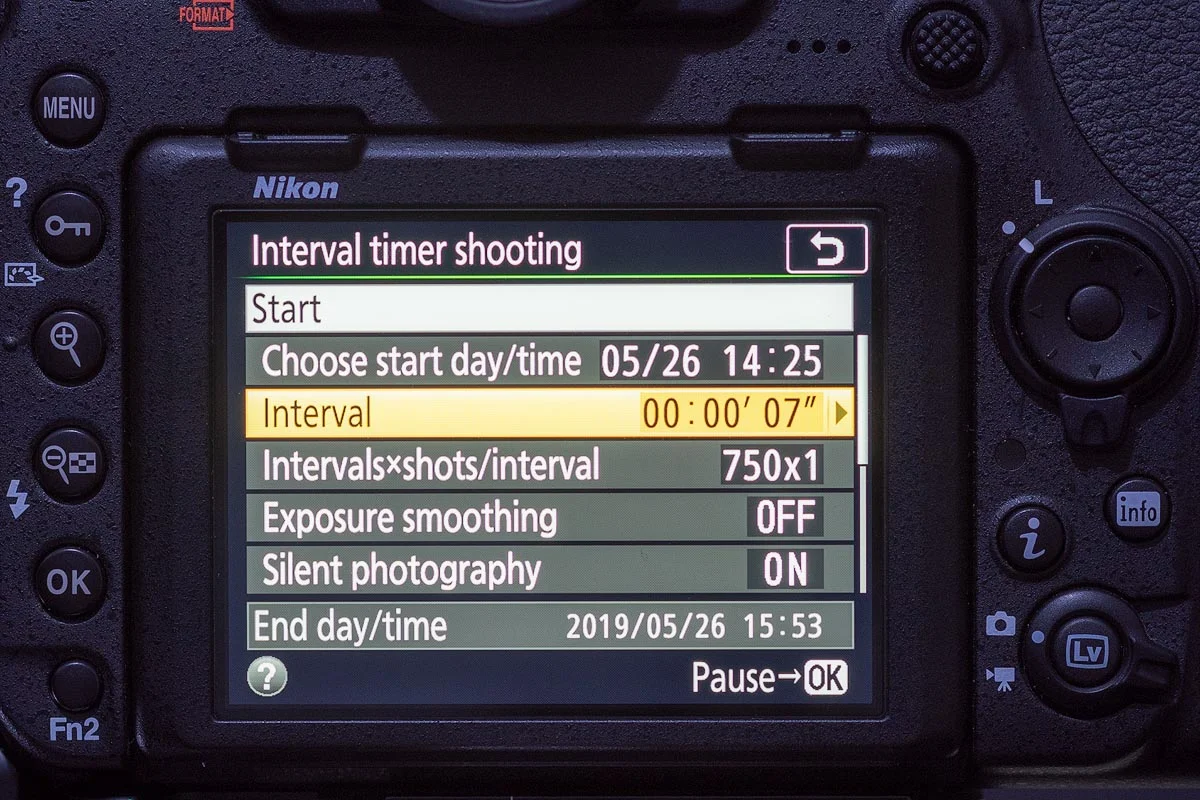
The interval needs to be longer than the maximum shutter speed you set in the app, allowing time for the Wi-Fi transfer of the image and the transmission of exposure settings changes from the app to the camera. I’ve been using 2 seconds more than the maximum exposure time.
Exposure smoothing has no effect in manual exposure mode, set silent photography to on to run the whole sequence with the electronic shutter (this avoids any aperture flickering).
Now press the start button to begin shooting the sequence.
Go back to the app and press the Auto Holy Grail button.

The app will now adjust the camera settings to maintain the same exposure as the reference settings based on the histograms. You can change these settings in the app during the shoot if needed using the reset reference button.

Once you reach a point where no more exposure changes are needed (for example when a day to night shoot reaches complete darkness) you can close the app and disconnect Wi-Fi to save battery power.
An alternative to using the D850’s built in intervalometer is to use the one in qDslrDashboard.
I prefer to use the D850’s internal intervalometer, on a recent shoot my phone lost the Wi-Fi connection to the camera, the camera then shut down the Wi-Fi and I couldn’t reconnect without stopping the timelapse sequence and going into the menu. I was able to ramp the exposure settings manually using the controls on the camera for the rest of the shoot. If I was using the intervalometer in the app, the sequence would have stopped altogether.
Follow the steps above up to the point where you captured the sample image and set your reference exposure settings.
To use the D850’s electronic shutter go into the settings in the app and press the LV button (the cameras exposure controls will be disabled after activating LV, if you need to change anything you can do it with the controls in the app.


Press the timer button in the app to bring up the intervalometer settings.


The interval setting works the same as the Nikon intervalometer, it is the time between the start of one exposure and the start of the next exposure.
I found that the interval had to be 2 seconds longer than the maximum expsoure time to avoid missed frames.
Once you have started the timer close that window and press the Auto Holy Grail button.

You must set your IOS device to keep the screen on for the duration of the shoot, if it auto locks the screen the app will stop triggering the camera and/or lose the Wi-Fi connection.