Nikon Intervalometer Guide
When I first tried to use the built in intervalometer in my D7000, I found the interface hard to understand and the documentation in the manual was severely lacking. Things have improved over time, but there’s still some important information that is not mentioned the manuals.
Because of this I’ve always used an external unit, but the D850 adds the ability to use the internal intervalometer with a fully electronic shutter which saves a lot of wear on the mechanical shutter when shooting startrails and timelapse footage.
The layout has changed a bit between camera models, and the latest cameras have added some new features. These images are from a D850.
Before you can use the intervalometer you must set the time and date in your camera’s setup menu.
Always switch the camera/lens to manual focus before you start shooting.
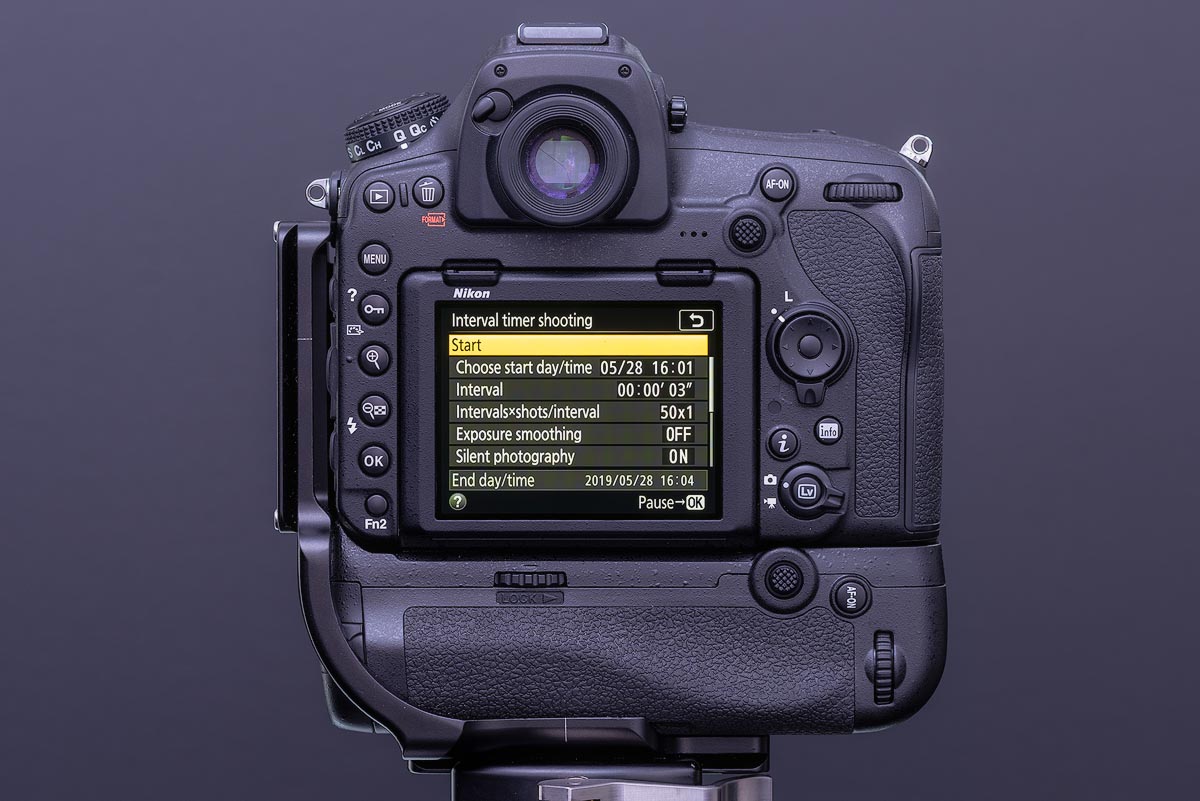
The intervalometer can be found in the Photo Shooting Menu.

Start. You can choose between start now or you can enter a time and date.


Interval. This is the elapsed time between the start of 2 shots. For example, if you want 10 second exposures with a 2 second gape between the end of one shot and the start of the next, you would enter the interval as 12 seconds.
On most of the external units I’ve used the interval is the time between the end of one exposure and the start of the next.


One important point that isn’t mentioned in the Nikon manuals is that when shooting exposures of 15 or 30 seconds, the actual exposure times are closer to 16 and 32 seconds. This can cause a lot of confusion when setting intervals based on the exposure times, as the results are not consistent with exposure times below 15 seconds.
From the testing I’ve done (using a D800e, D810 and D850), these are the minimum intervals required to avoid missed frames:

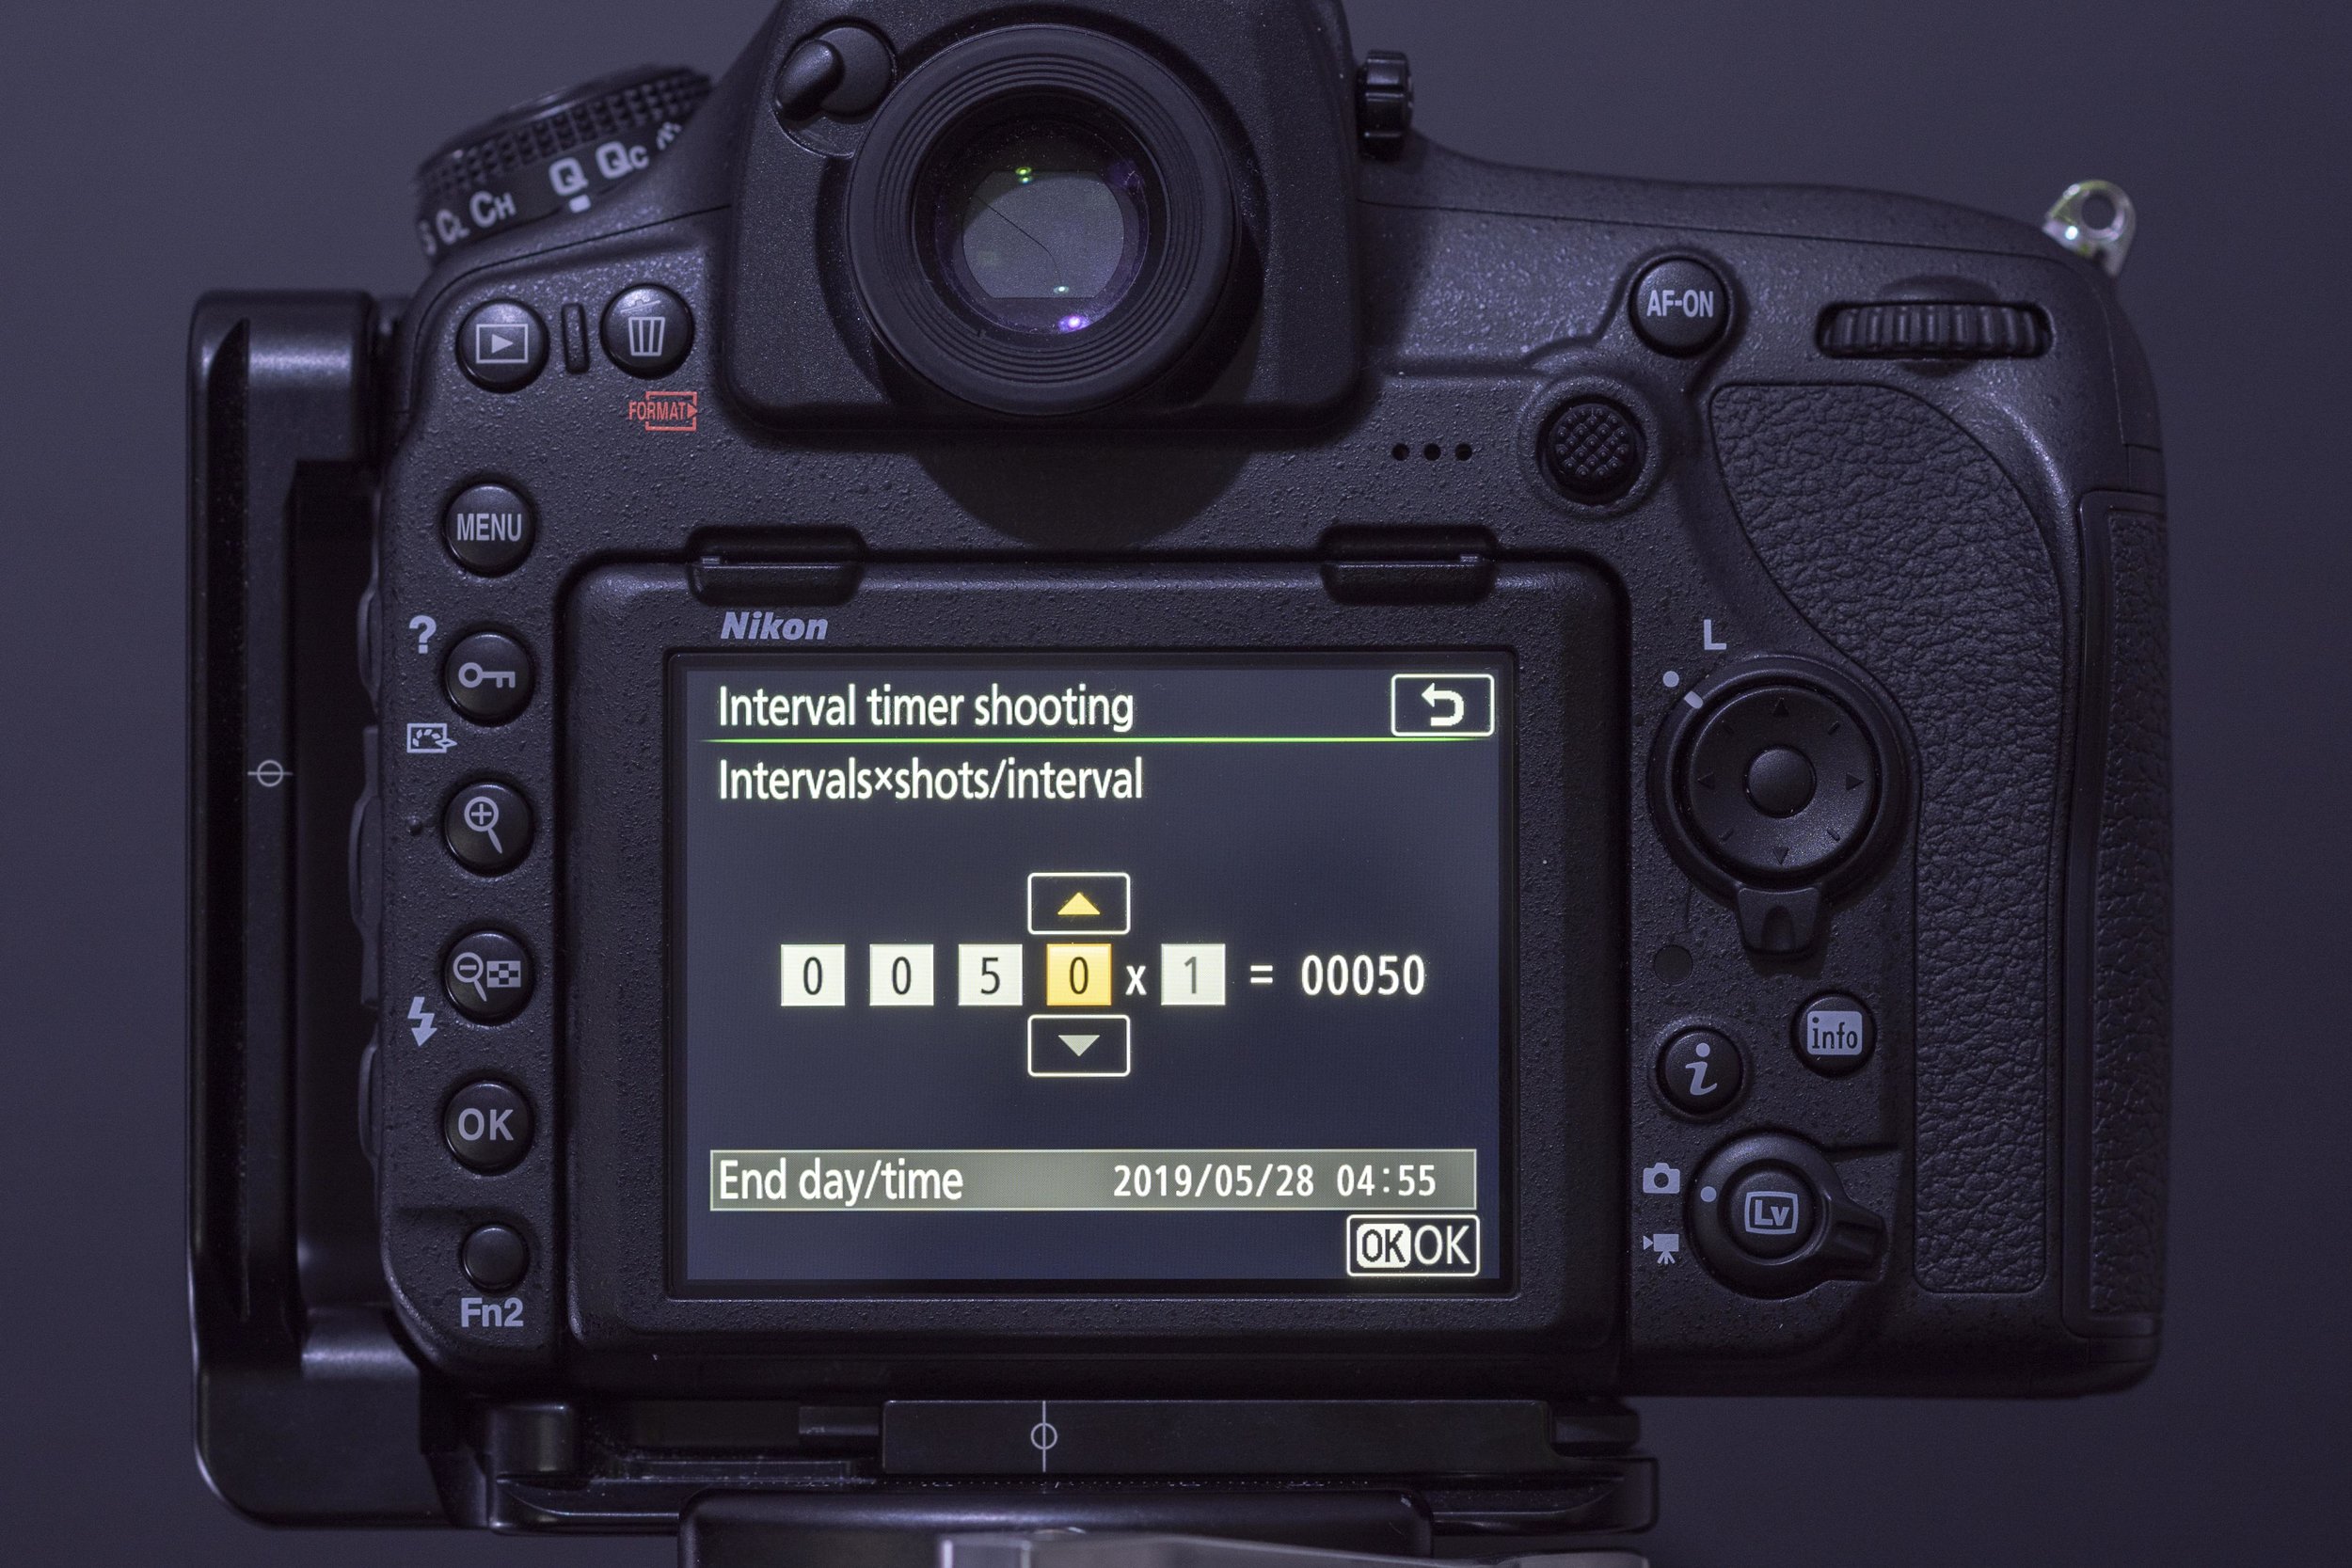
Interval x shots/interval. The first number (50 in the image below) is the number of intervals, the second number (after the ‘x’) is the number of shots per interval. In the example below the 4 second interval will be repeated 50 times, taking a single image each time. As you change the numbers for intervals and shots/interval the total number of images (the number after the ‘=’ will update).
If we changed the ‘x1’ to’x2’, the 4 second interval will be repeated 50 times, but we would get 2 shots each of those 50 times. This would be used for something like a HDR timelapse (in combination with bracketing), for regular timelapse or startrails, keep the number at one shot per interval.
The intervalometer in the D800e is limited to 999 intervals, the D810 and D850 can do 9999 intervals.

Exposure smoothing. This automatically adjusts exposure when shooting in Aperture Priority mode or Manual mode with Auto ISO Sensitivity on in an attempt to maintain a consistent exposure across the frames to reduce flickering in a timelapse sequence.


Silent Photography. This uses the electronic shutter, at the start of the sequence the mirror will flip up, all images in the sequence will be captured using the electronic shutter, the mirror will flip back down at the end of the sequence.
I have heard of issues with banding when shooting under artificial lighting with this turned on, I’ve never experienced this myself, but take a few test shots before you start to make sure everything is ok.


Interval Priority. With this turned on (in modes A and P) the interval time takes priority over the exposure time.
For example, with this set to off, shooting a day to night transition with fading light, the camera will gradually increase the exposure time, once the exposure time becomes longer than the interval the camera will start to miss shots. In a timelapse sequence this will result in the movie speeding up after a certain point.
When set to on the shutter speed will be limited so the interval time can be maintained, this can result in images being underexposed.


Starting Storage Folder. This creates a new folder on the memory card every time you begin a new sequence. If you shoot multiple timelapse sequences it makes it a lot easier to see which images are a part of the same group.

